Hiking the Peak - Telluride

Everyone knows where to find Mike Price after a day of work. Oak is only a door and a half down from his shop and the bartender pours us beers before we even walk in. It would be a problem if it wasn’t the place where you not only found him but his boss, often co-workers, and truly the rest of the town. Or the people in town you want to be around anyway. I’m telling you all this because it was one Tuesday night at the Oak where we happened to decide to do a Peak mission the very next day. Beers and the realization the mountain will close soon got us motivated to get after it that night and I’m sure glad we did!

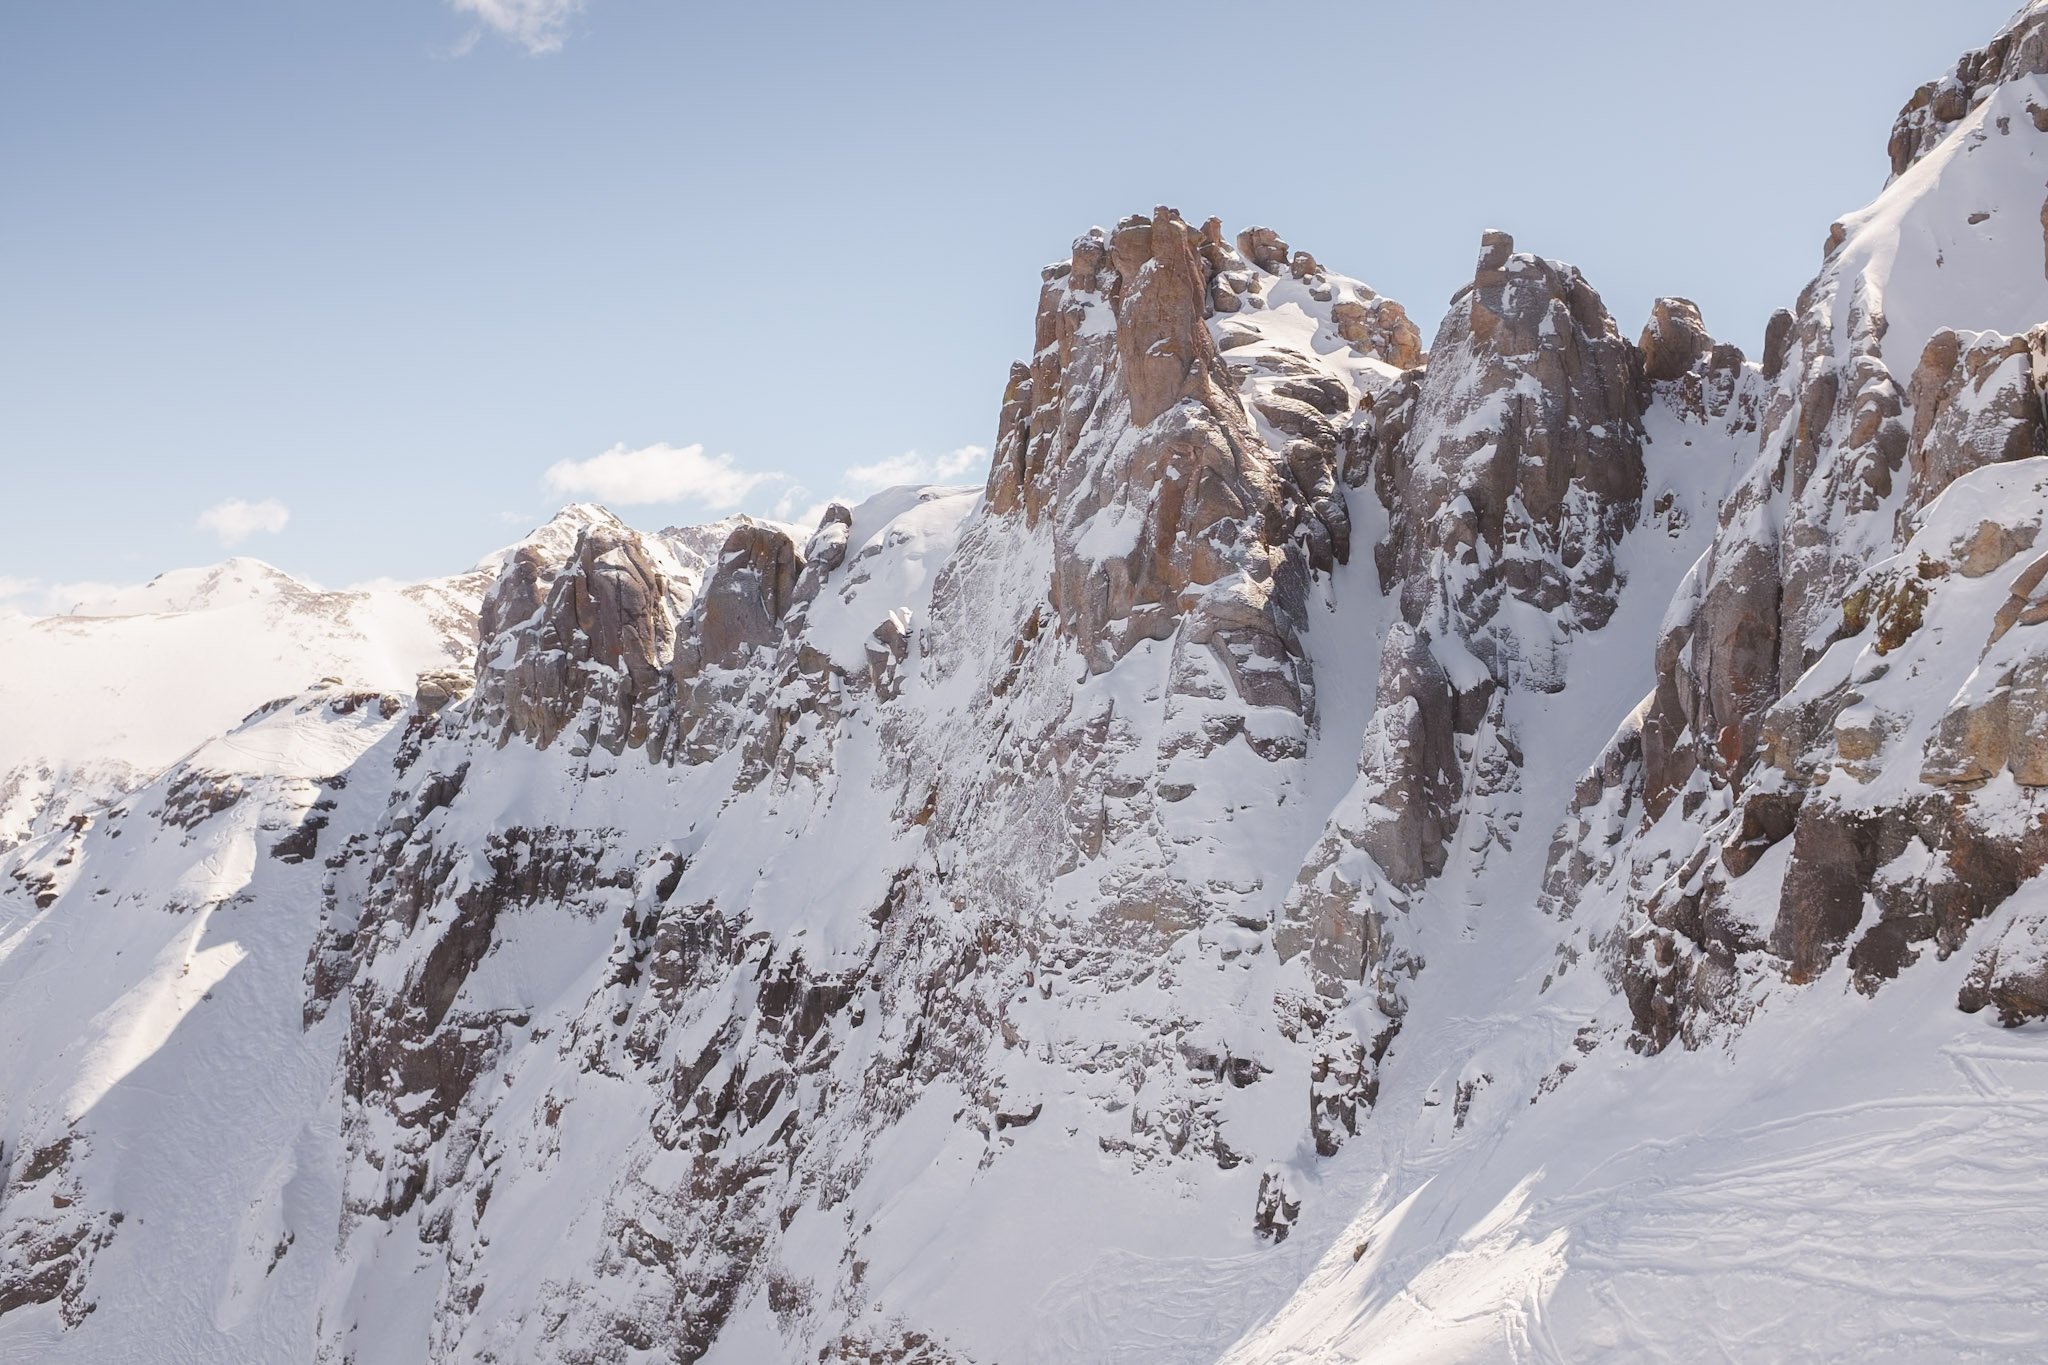
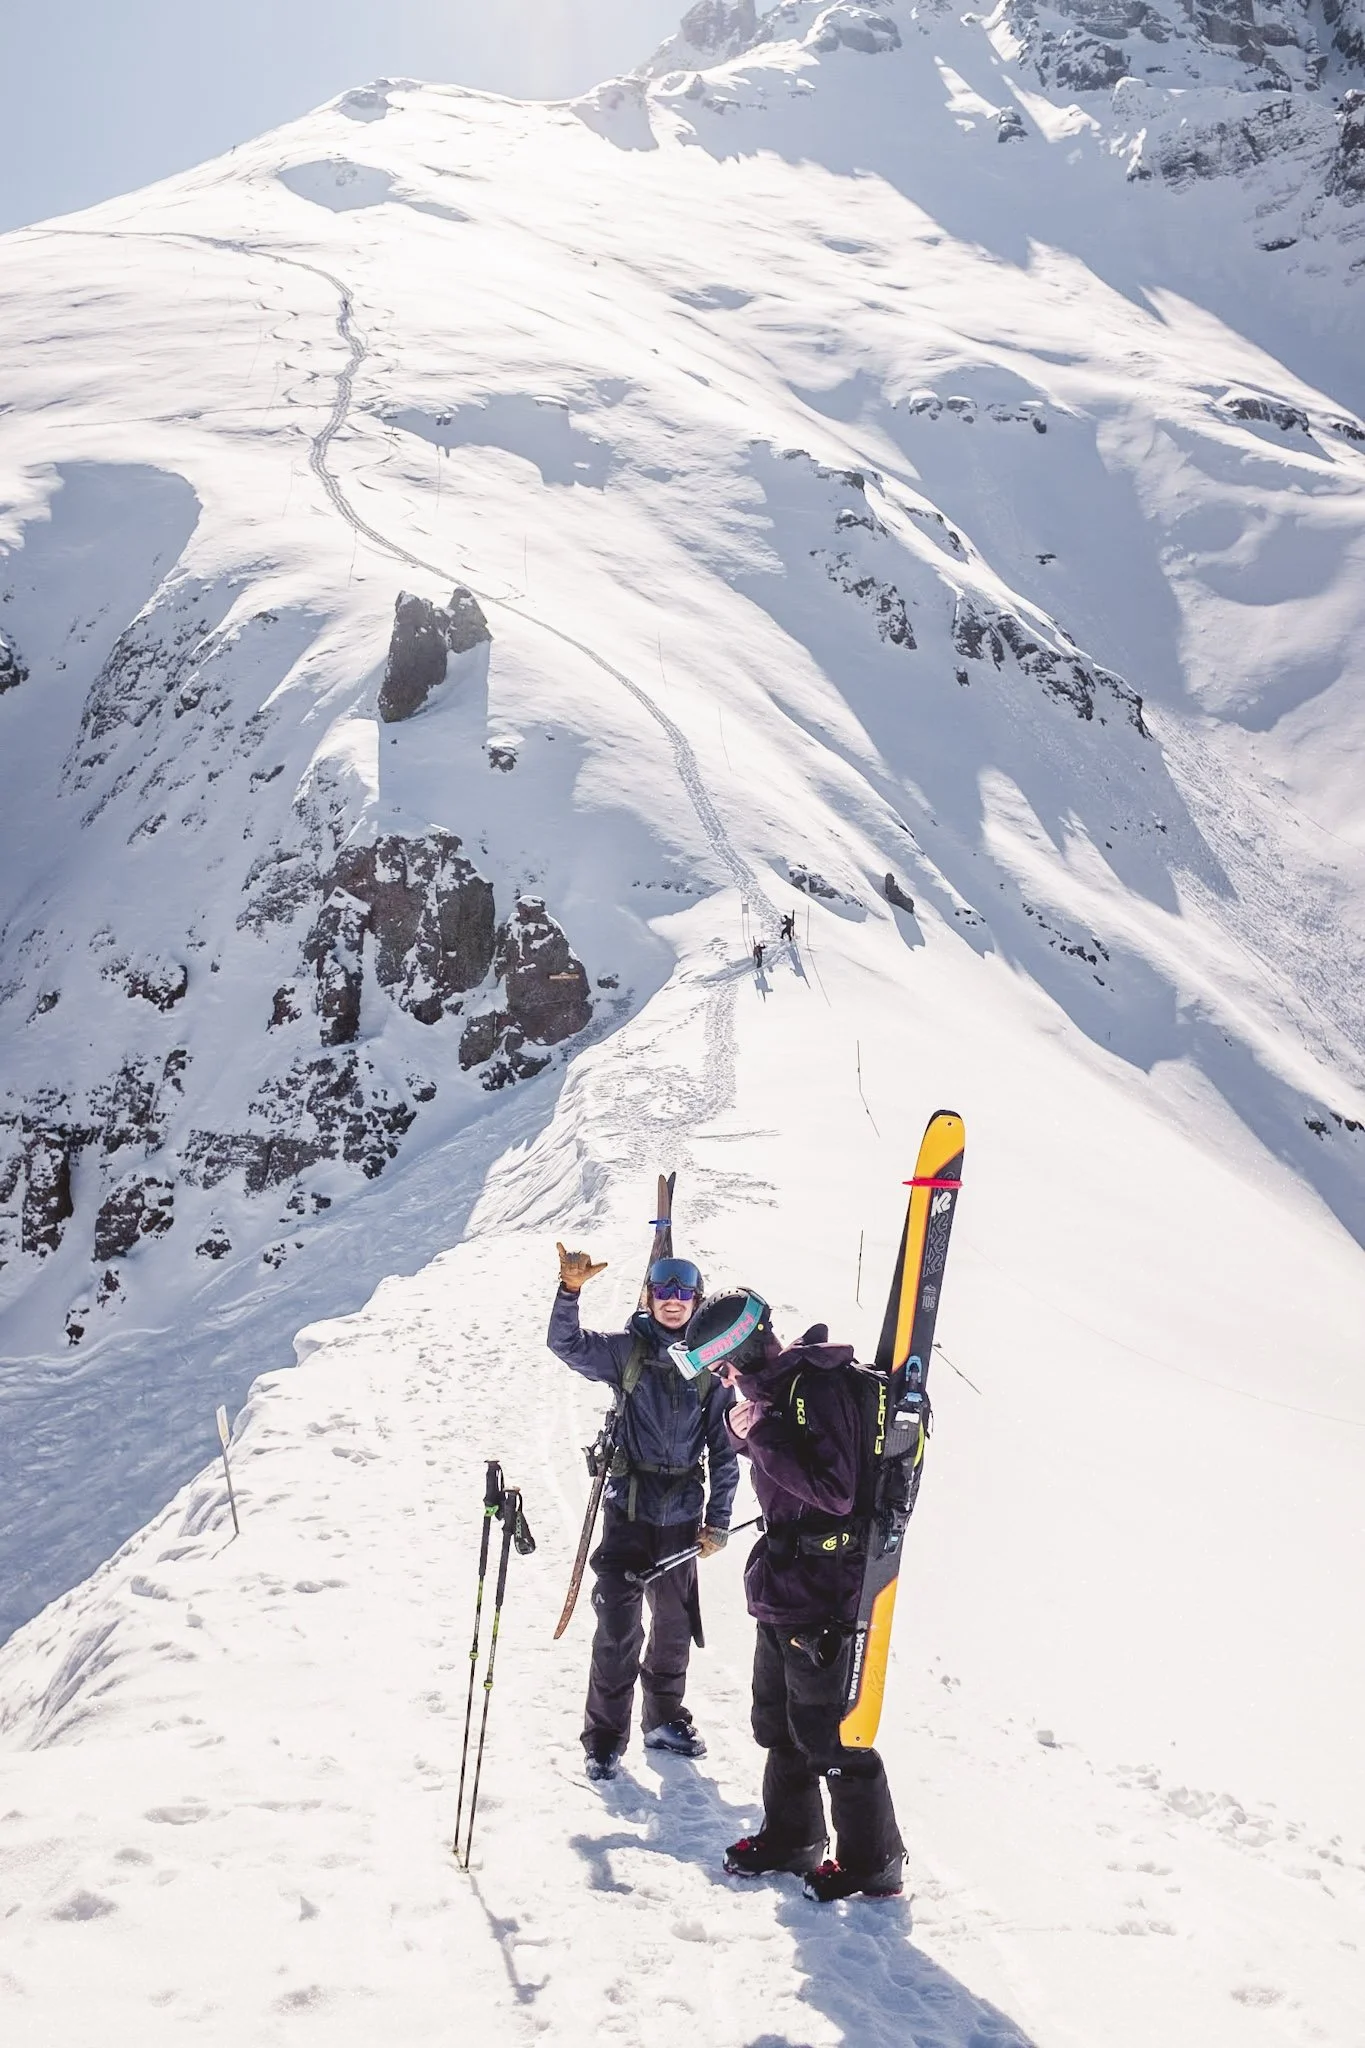
The Peak that I am referring to is of course Palmyra Peak the tallest point at the ski area and one of the tallest places you can ski in bounds just about anywhere I suspect. It’s taller then 1310 at Loveland and for sure gets you higher then that silly lift people talk about at Breckenridge. Google informs me that the top is 13,319 ft and I can say after hiking from Chair 12 to the top it sure feels like 13,000 ft and the exposure you feel at the top is no joke either. To make it worse they give you a small snow pack platform to balance on at the top, not usually a problem unless you are sharing it with 3 other people…

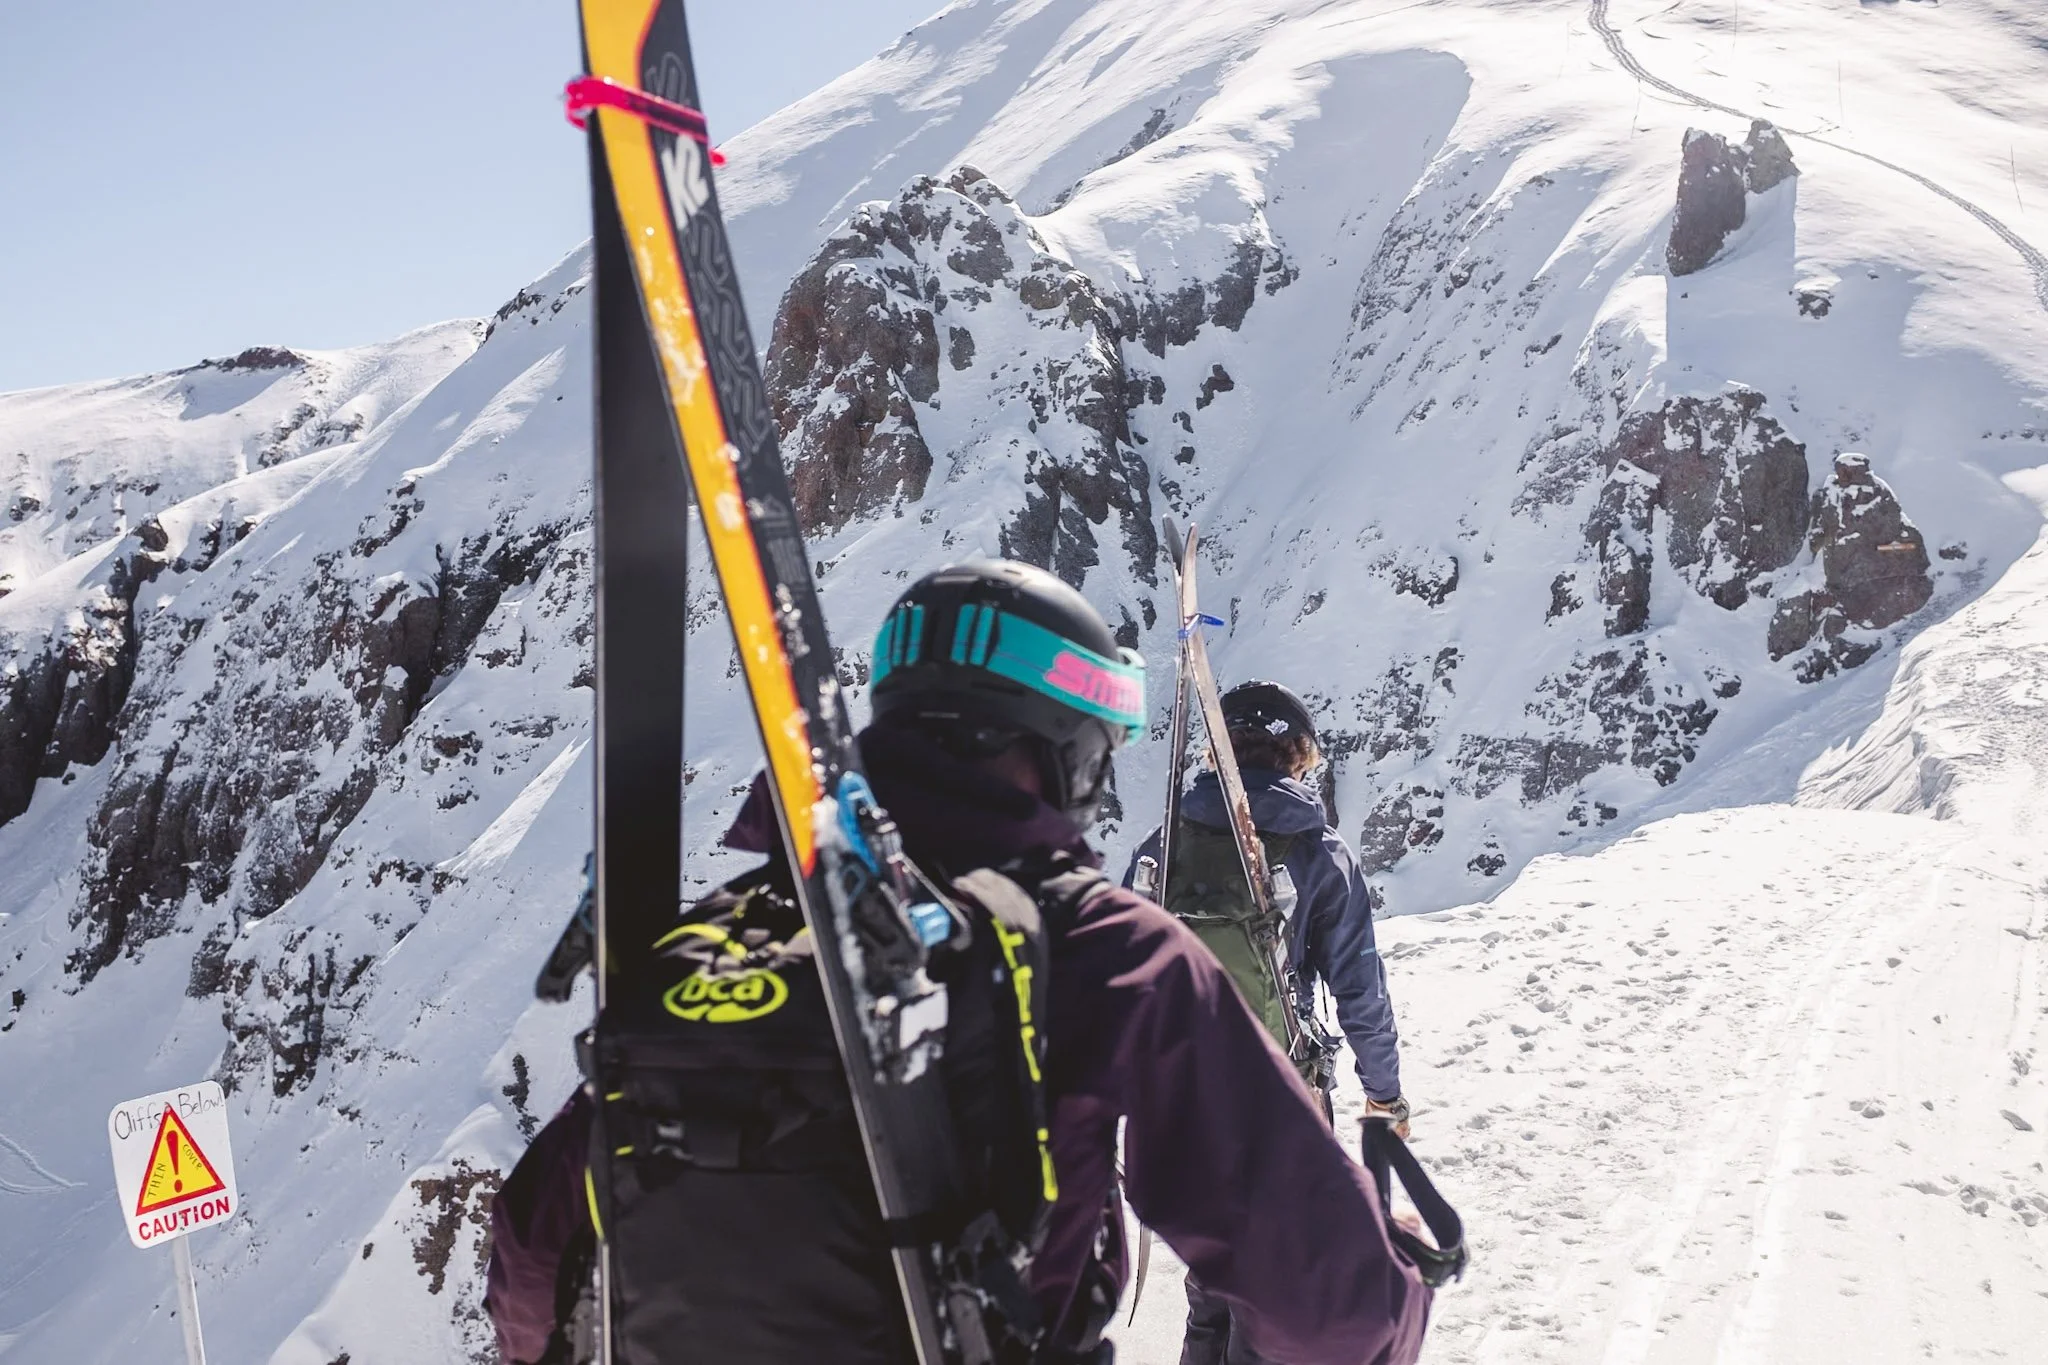
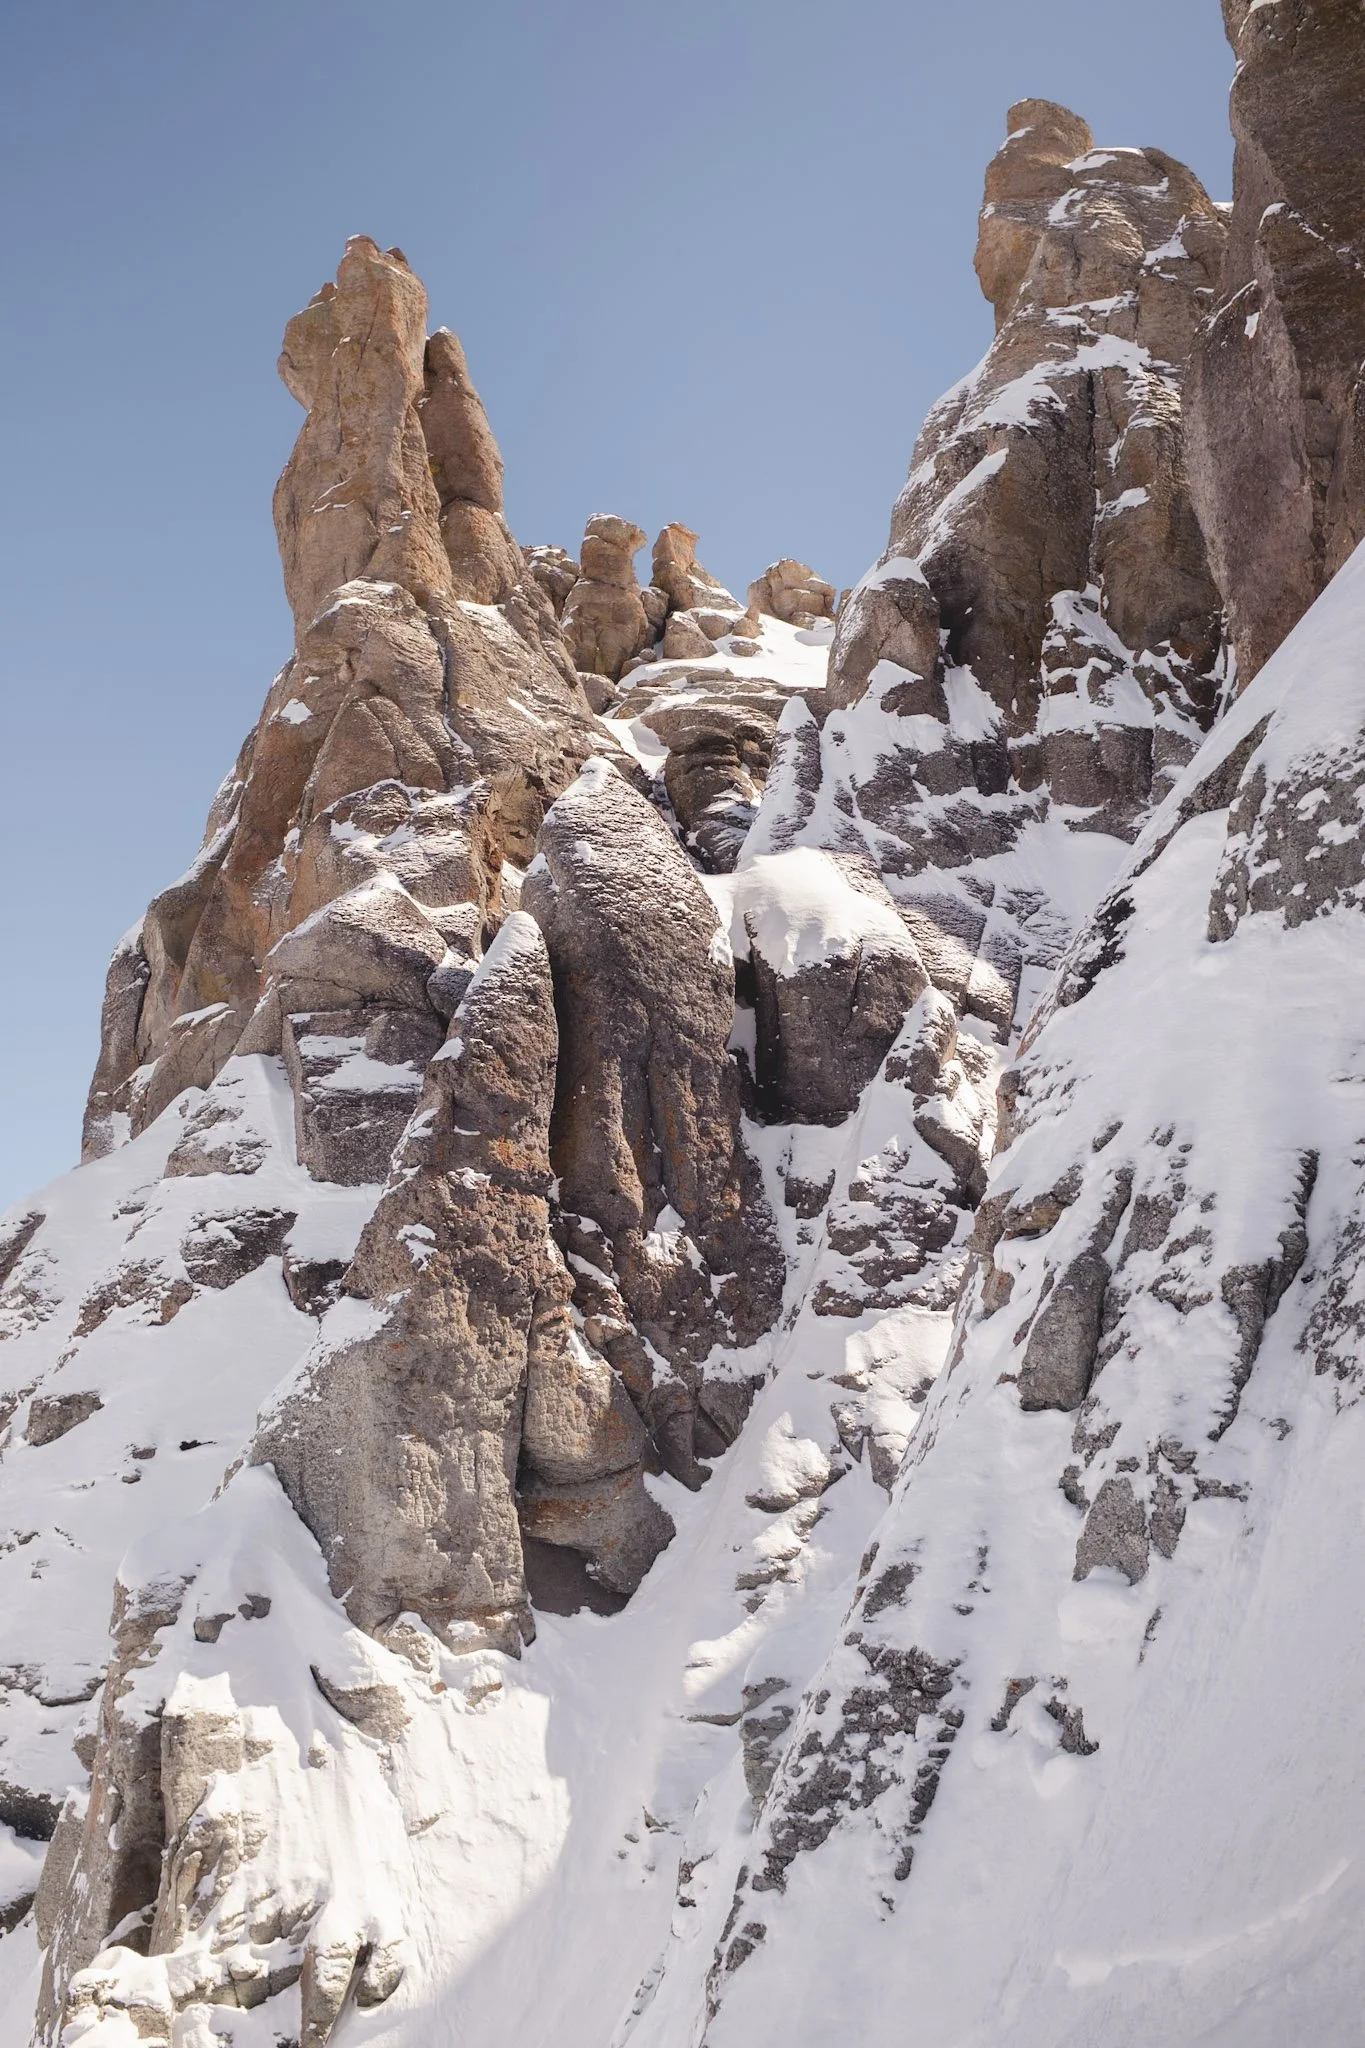
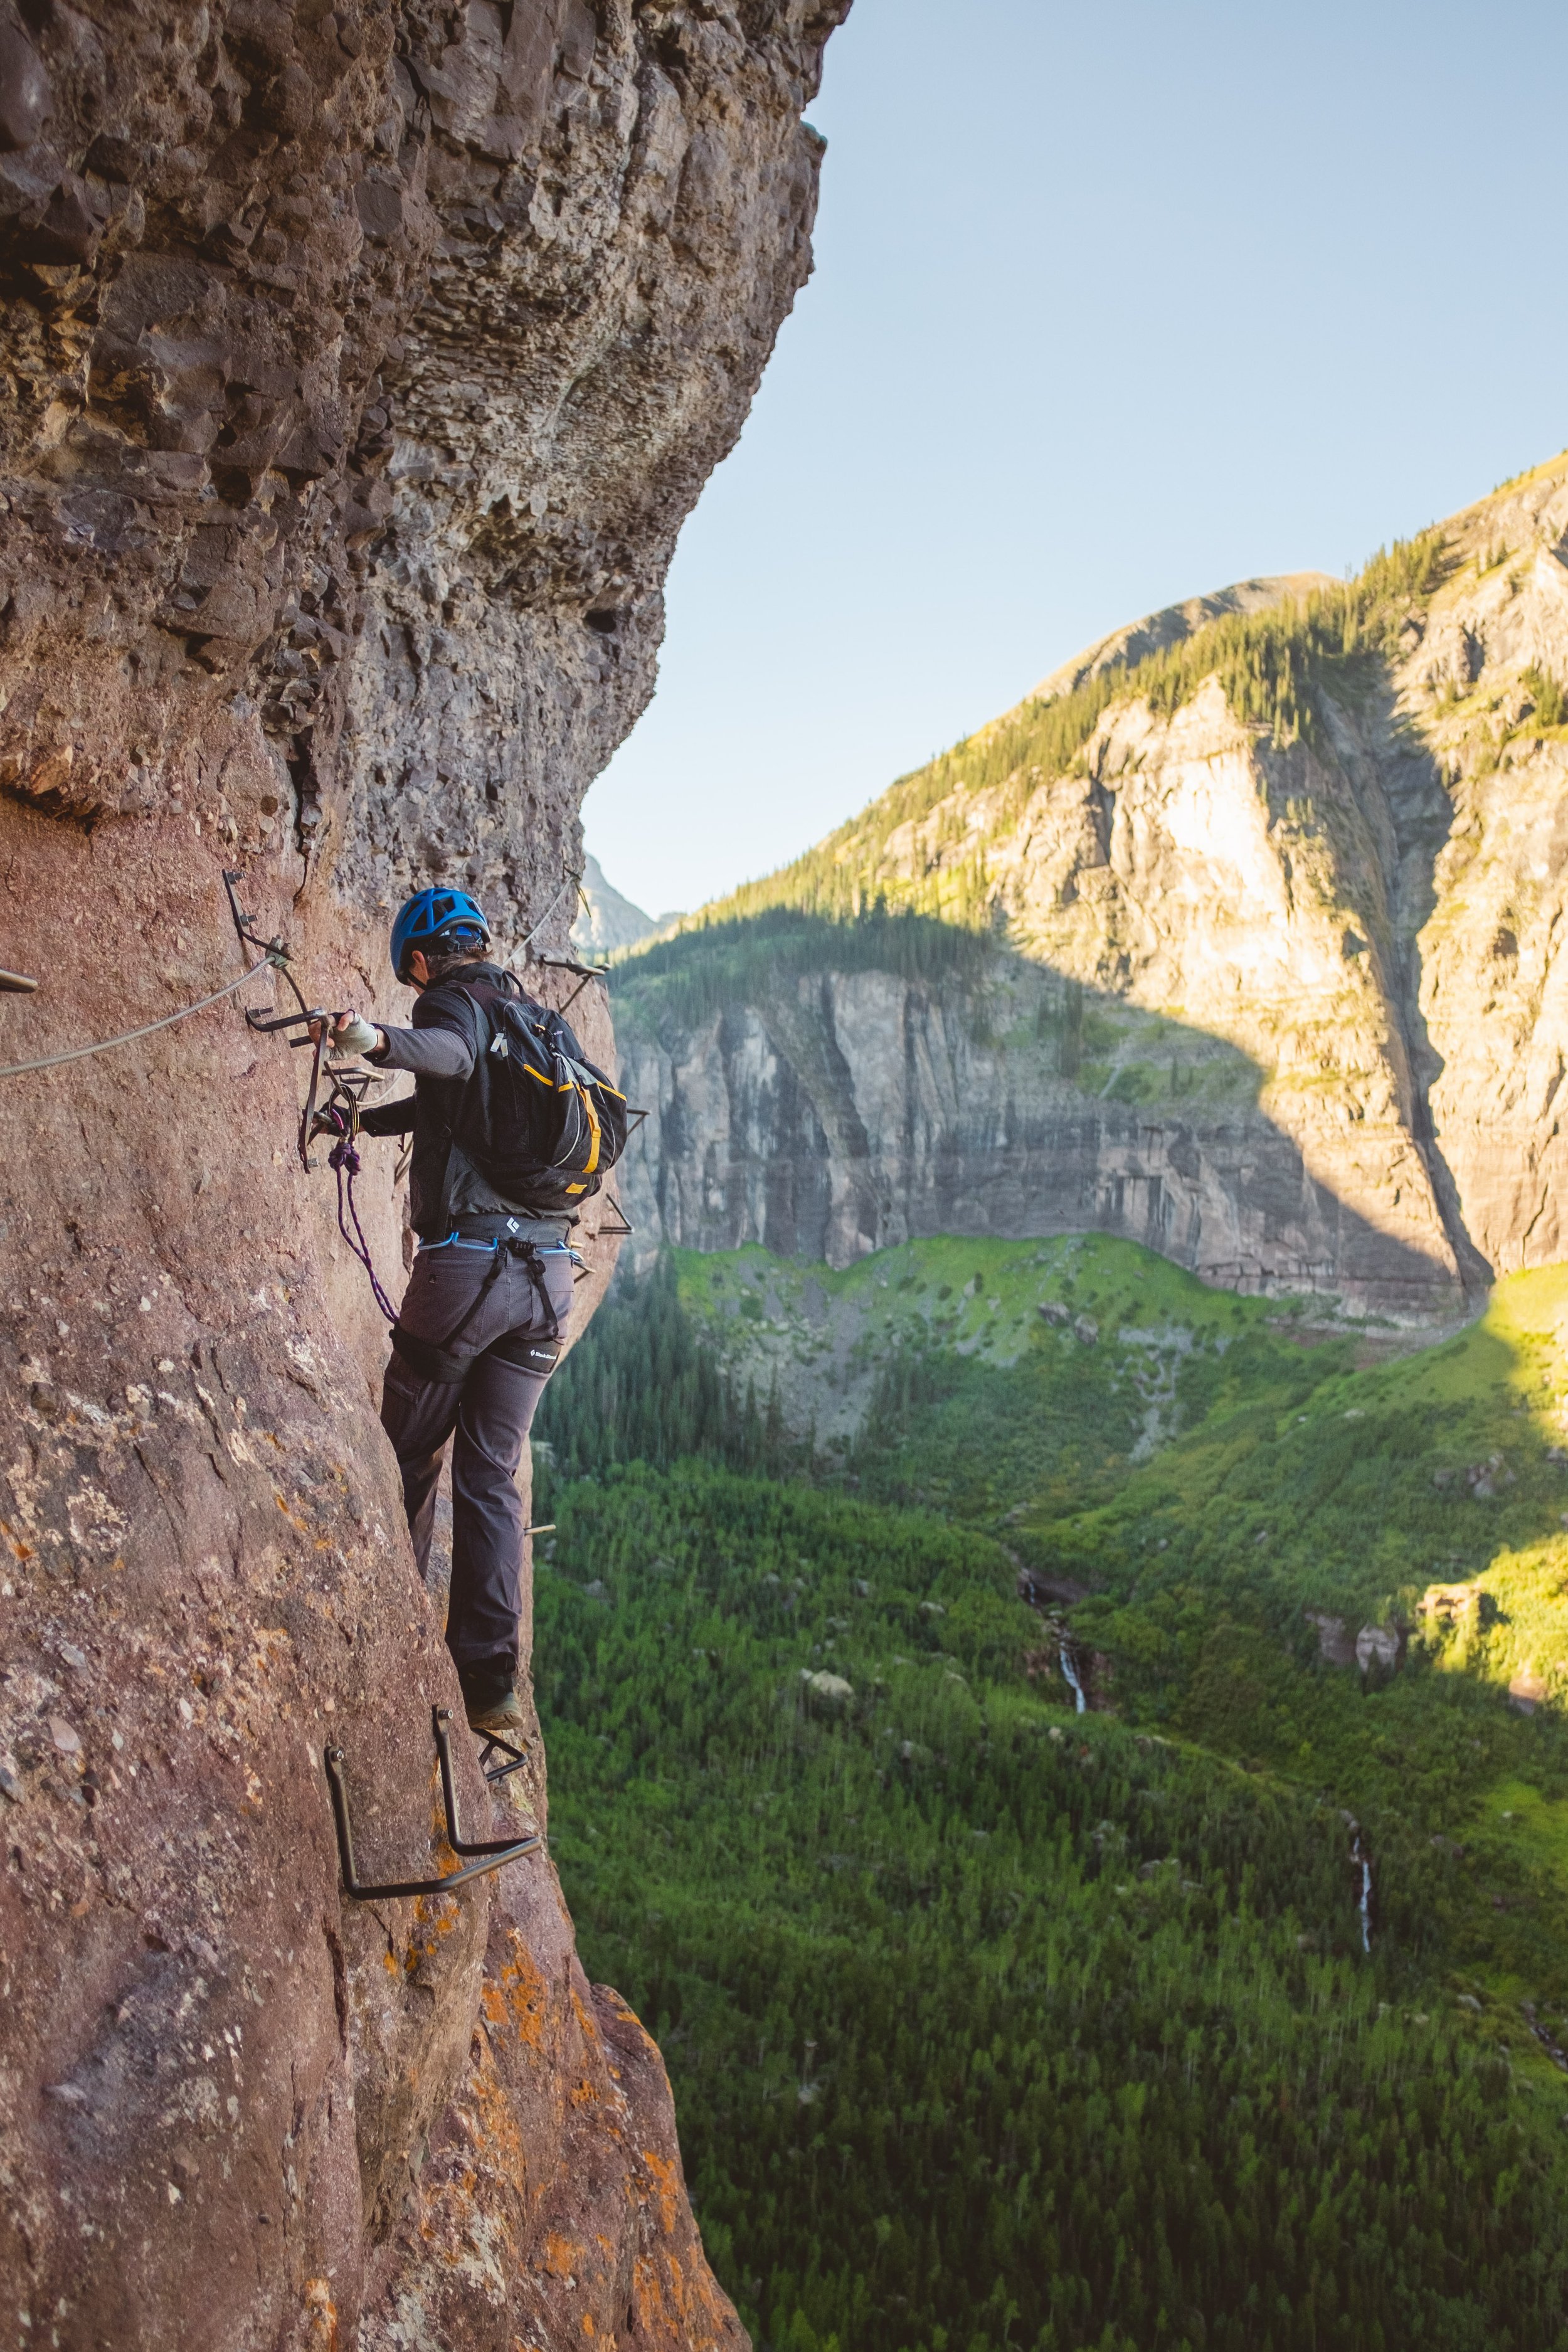
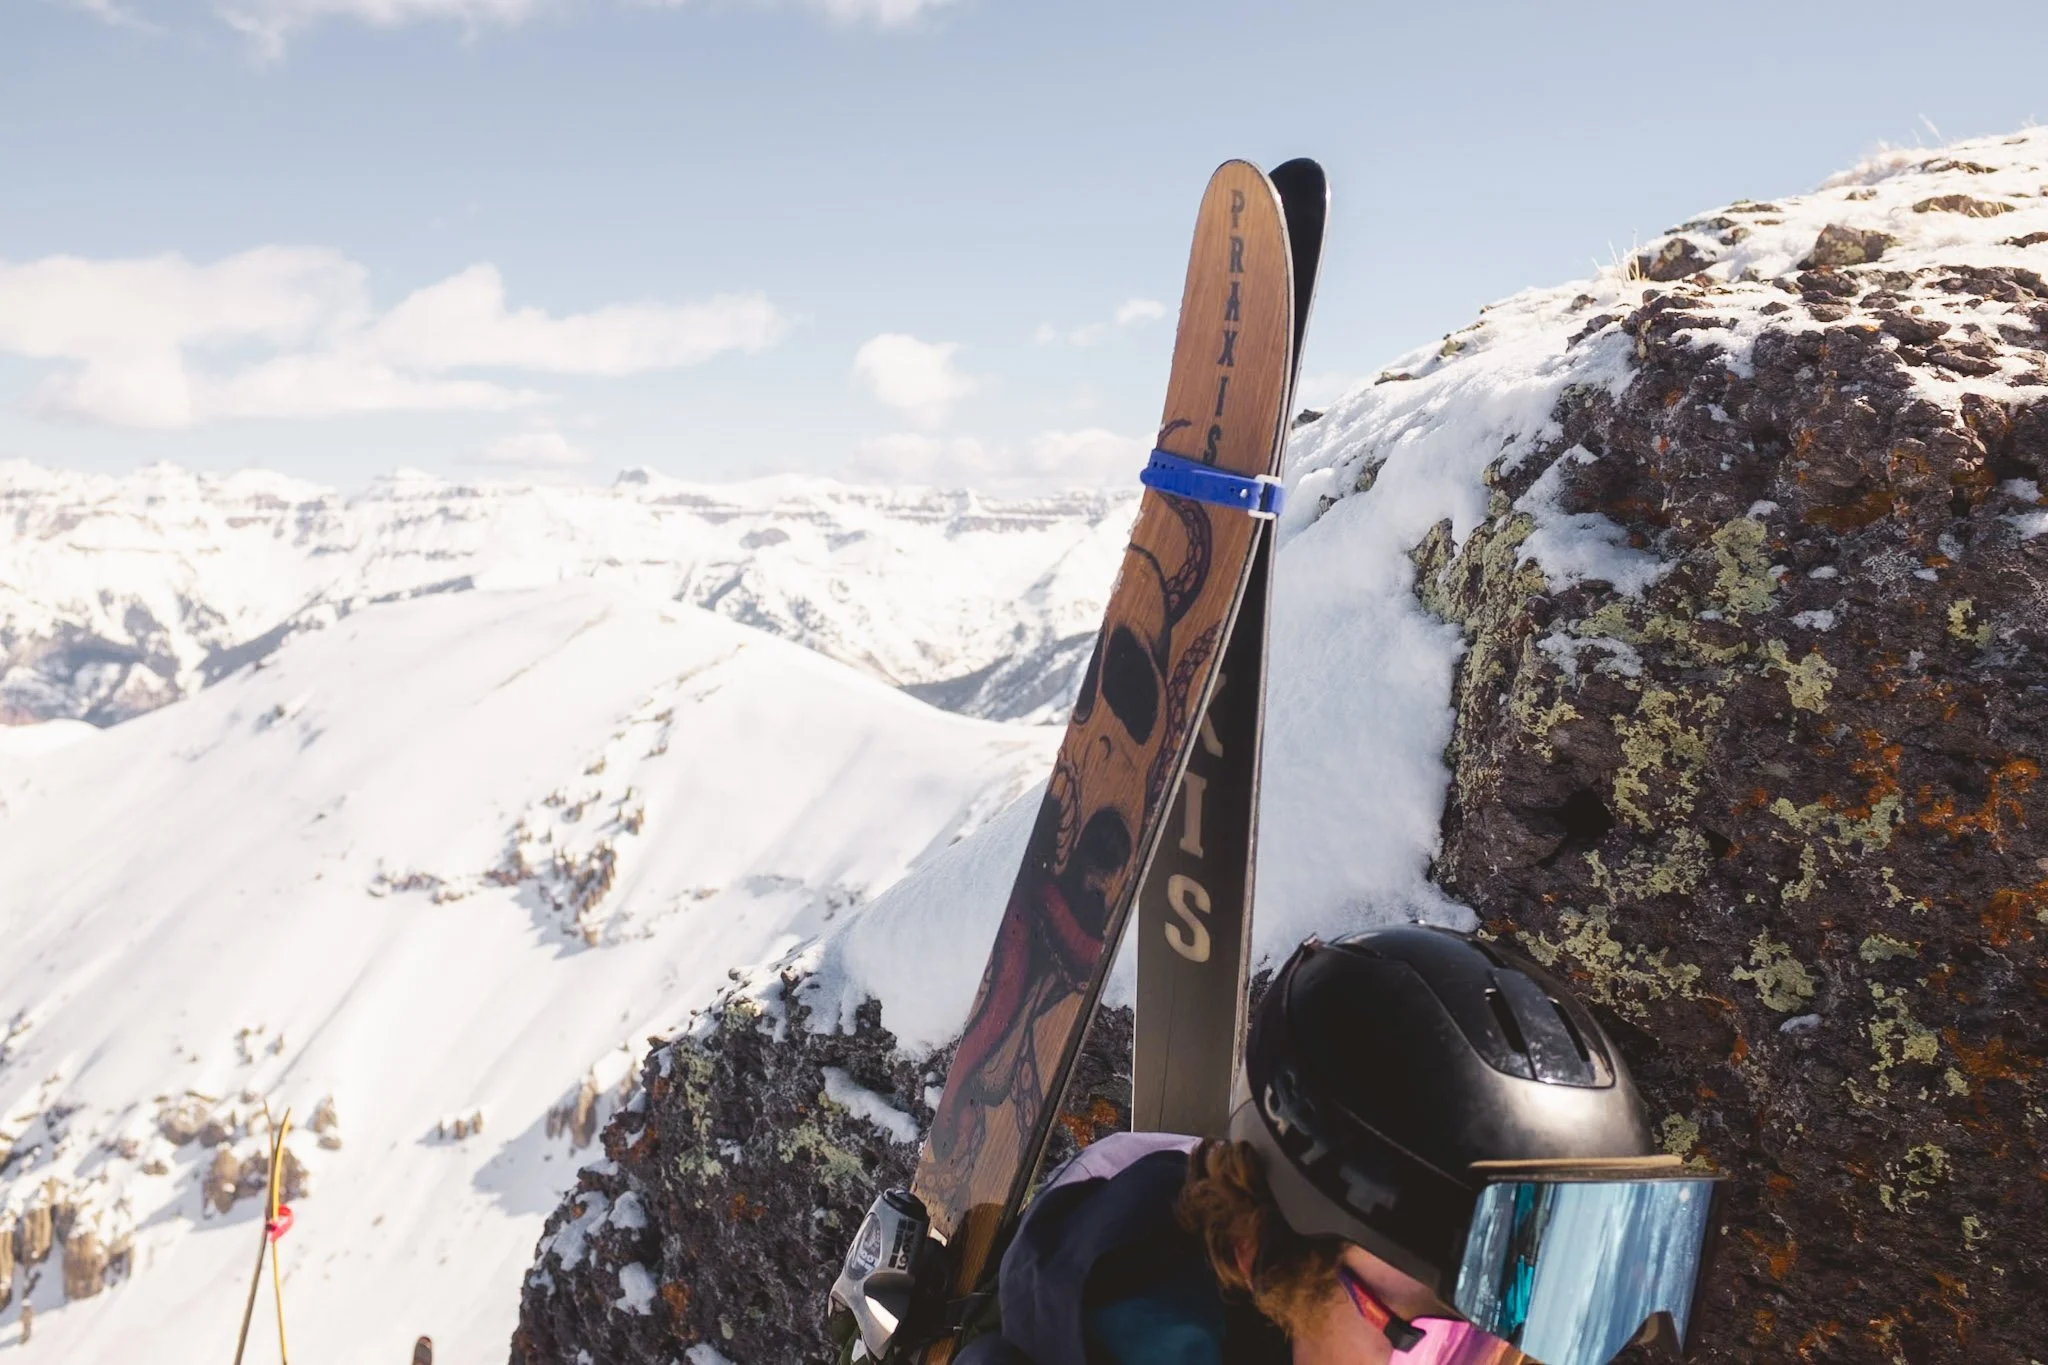
I’m not really sure how far the hike is or how many feet we had to climb but all in all it could have been much worse than it was. It took us just about an hour to get up and in all reality the hike was scarier than the ski. It’s always funny to make jokes about falling into Ophir or Alta Lakes from the resort when you are doing the short hike-tos bellow the peak but when you are on a boot pack on top of skree in hard ski boots that possibility seems much more likely. There’s at least two places that got me a little spooked between the steep narrow shoot below and the chawsy wind swept boulder you had to scramble. And really once you pass through the gate the whole hike is a no fall zone, you probably won’t die but you might be wishing you had looked at the map longer.

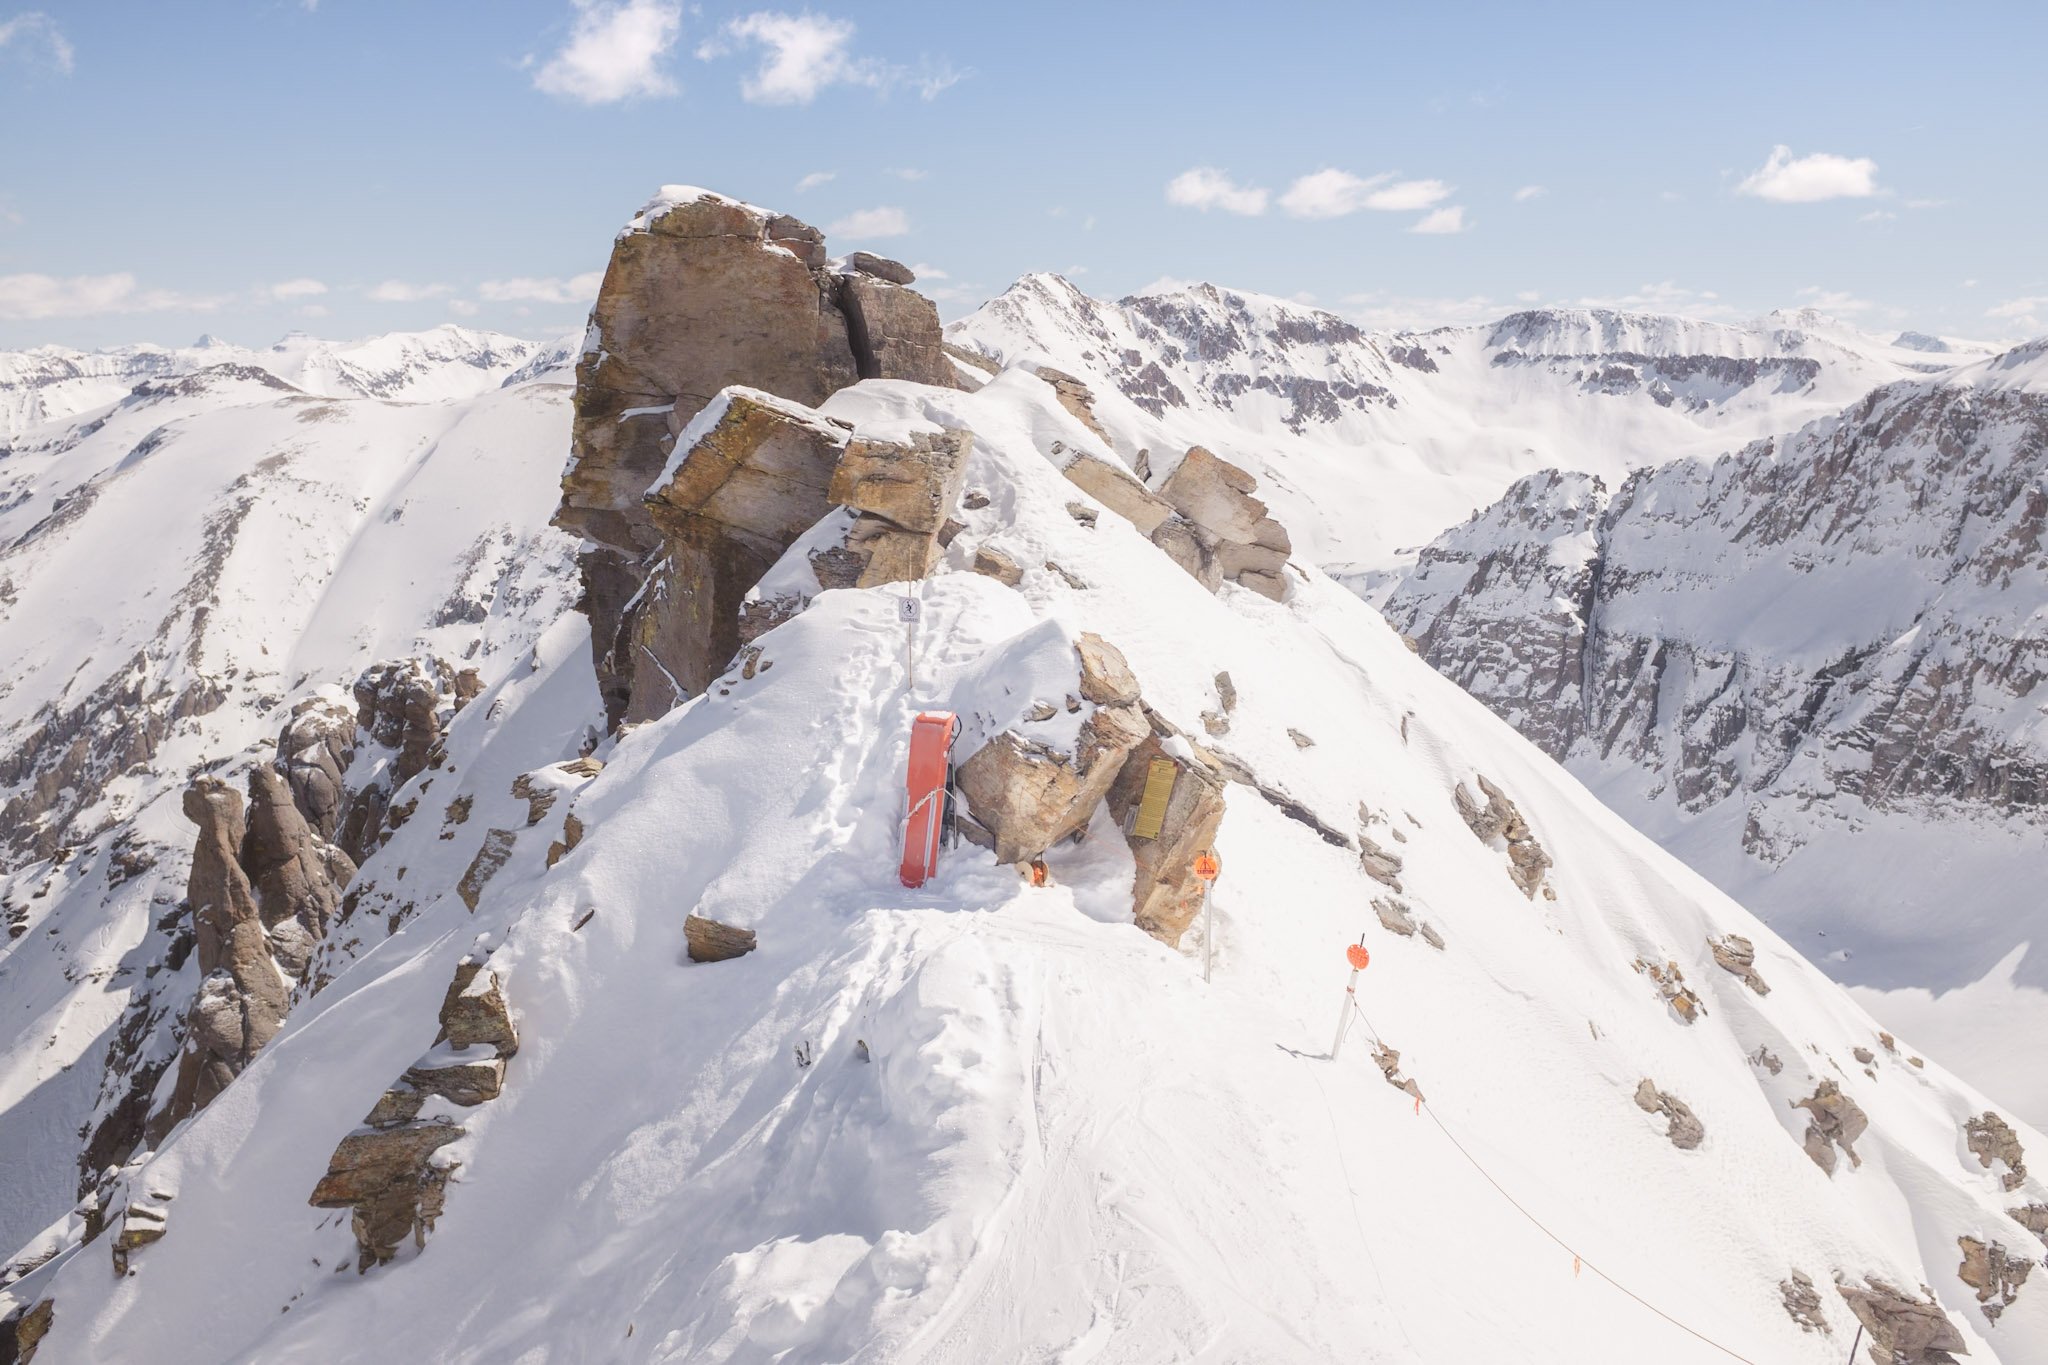
Once at the top and you concur the last nearly vertical boot pack, you are welcomed by a bright orange toboggan (that some poor soul undoubtedly had to hike up there) and a bamboo rope line to remind you that you are still in the boundary of the ski area. It’s an important reminder given the terrain you are about to ski. It’s no baby hike-to-ski or palma lift to above treeline, it is just what you should expect when you look at the tallest mountain out the window of the Gondola. A variable, windy, and steep 13,000 ft peak that for some reason you are allowed to ski down just like any other run on the mountain. And that’s just what we did. We clipped into our bindings, pointed our tips downhill and went for it. I wish I could say we got a fresh powder line down the couloir but it was chopped, old north facing snow that was just interesting enough to get your heart to pump when your skis did something a little different then you wanted them to. But from there you can drop 4,500ft down to town have another beer at Oak and keep skiing if you wanted to.

For me I headed back down to town and retreated into the library to get at least a half day of work done. I’m sure going to miss the ability to walk out the door, hike up a mountain, ski with good friends and then just pretend it’s another day at the office. This may be a post for another time but being able to experience all of this in the context of what I do (for those who don’t know I spend most my days supporting the Industrial Efficiency and Decarbonization Office at the US Department of Energy) makes everything just work.

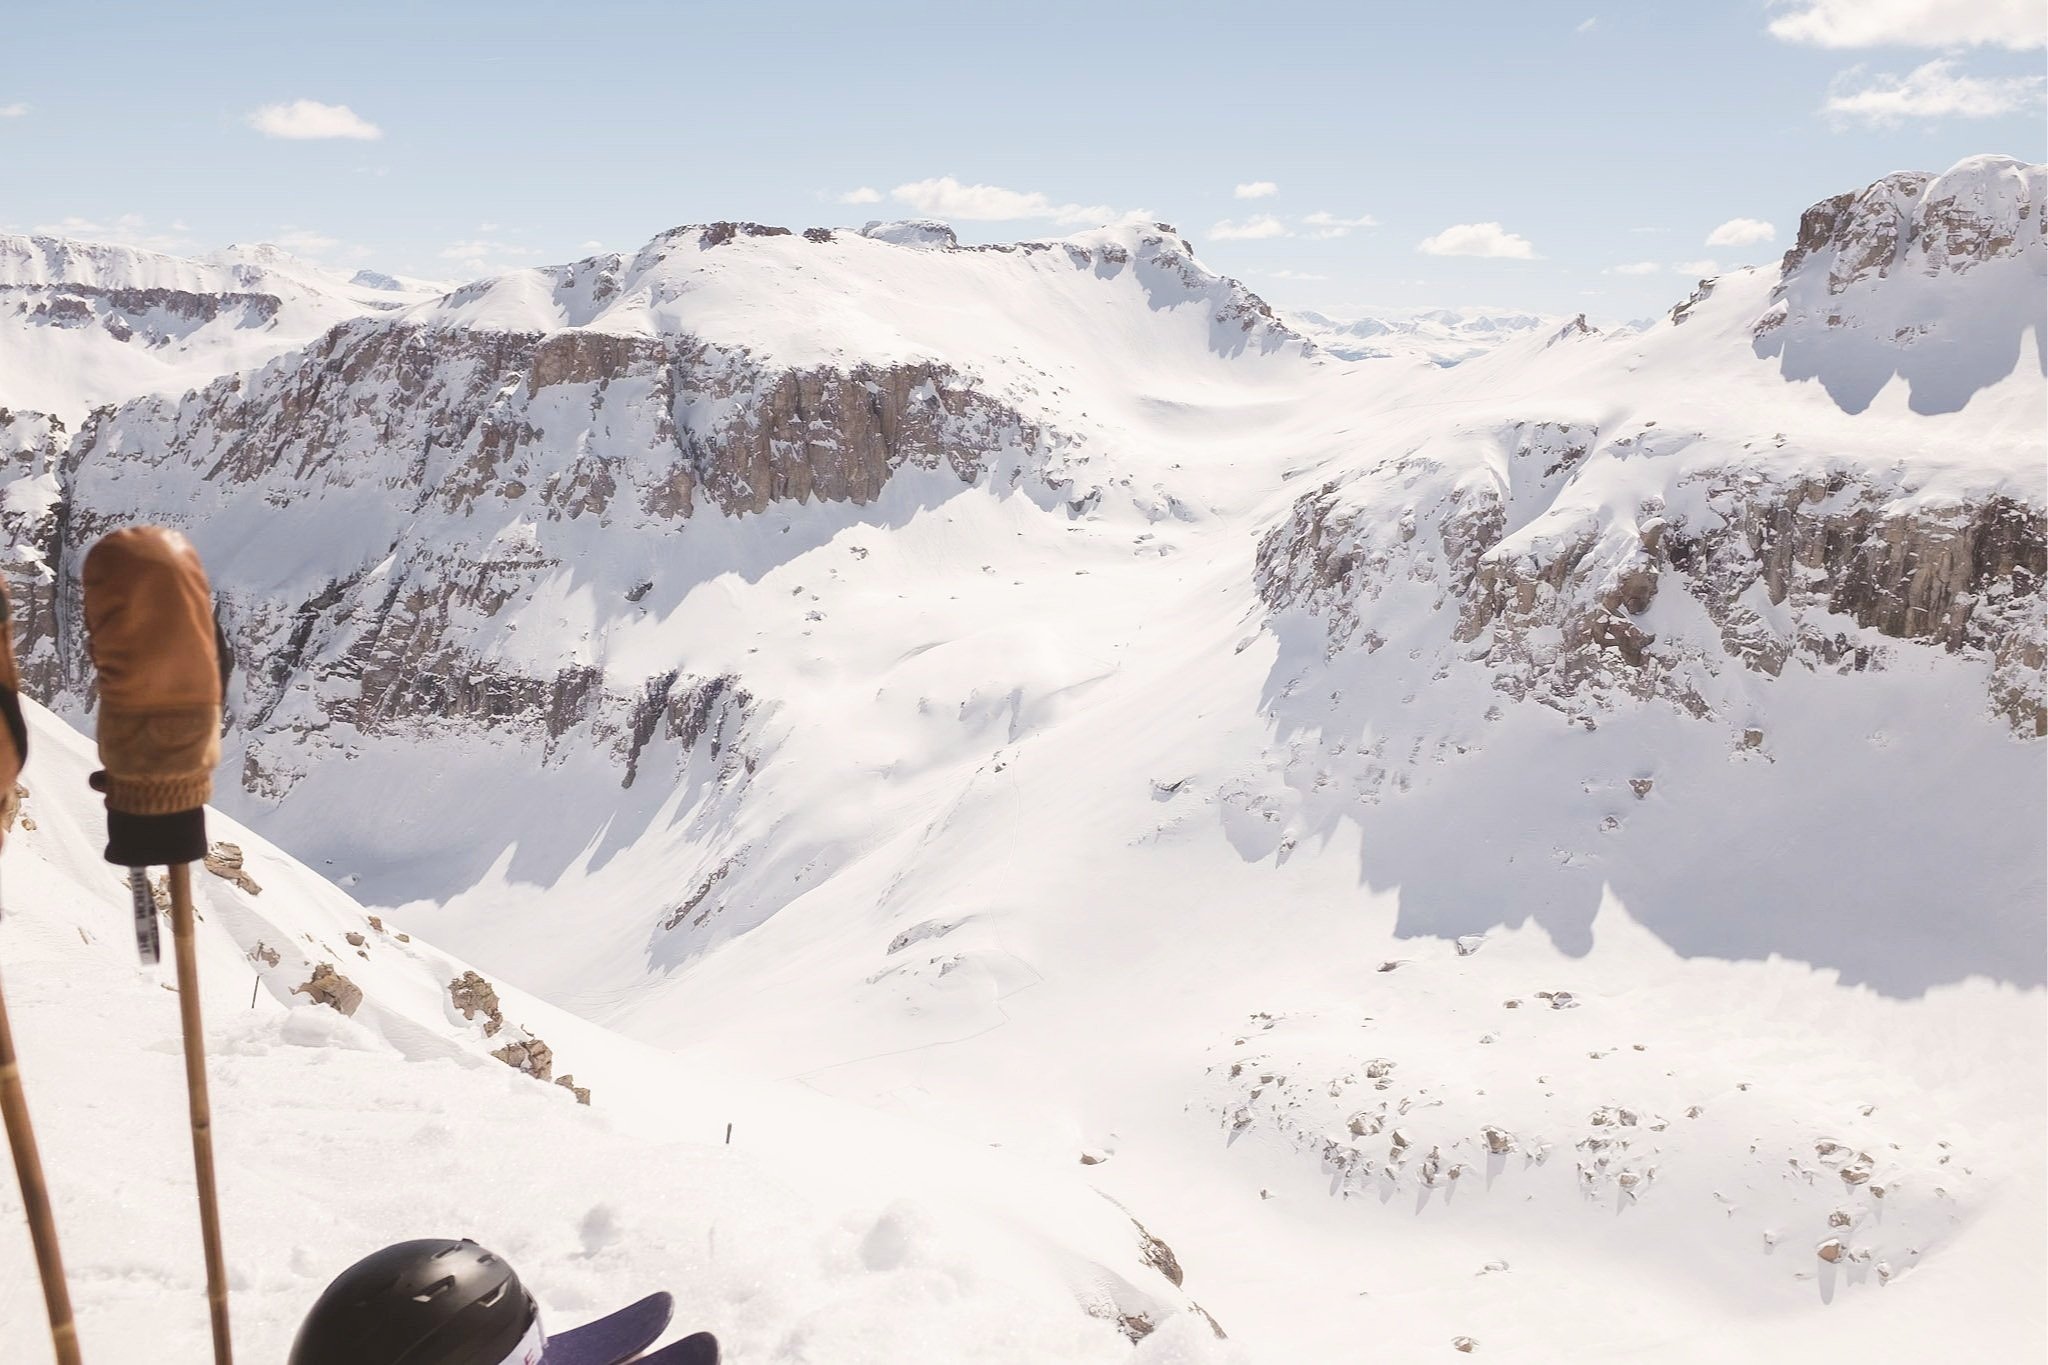
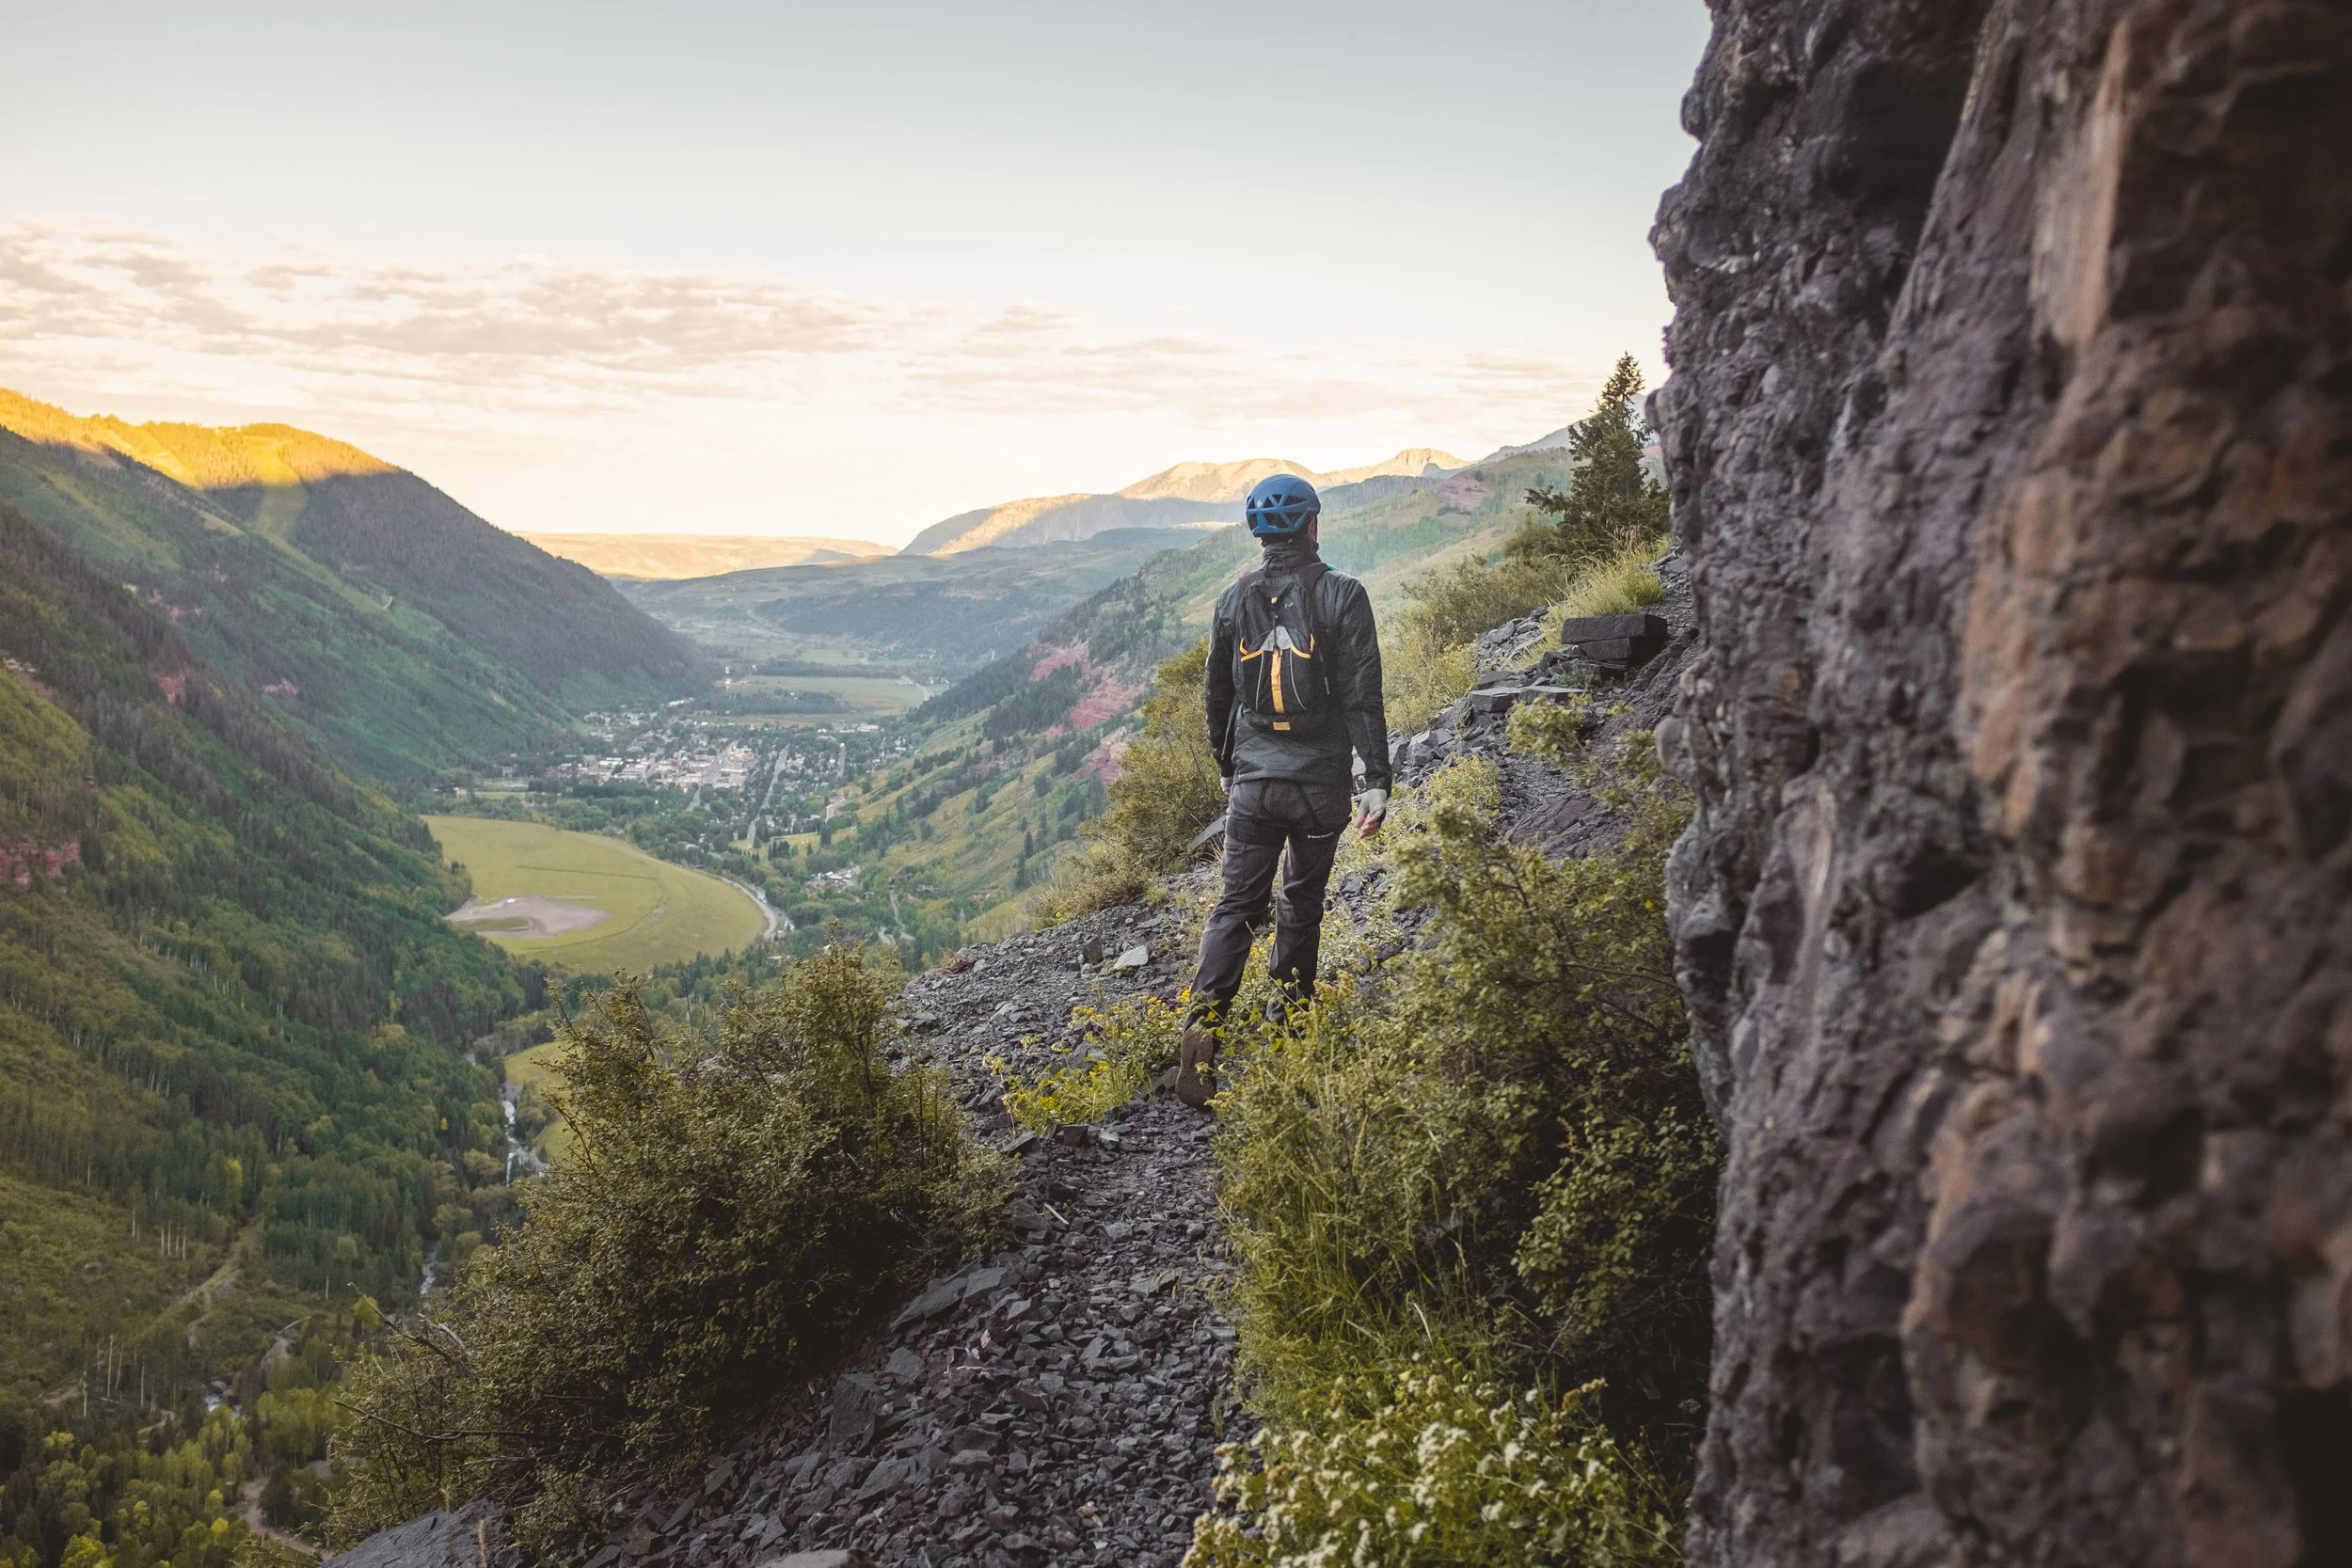
On the far left side of the image if you look close there is a zig zag skin track and people hiking up from the uppers and into Ophir (my guess at least).

Leadville Colorado

The last couple years I’ve had trouble finding myself a project, one of those projects worth putting a couple years of image making toward. My lingering dream is still a project focused on Idaho salmon, conservation, history of the sawtooths, blah blah. But last winter, and this last spring, has gotten me interested in Leadville Colorado. Leadville is one of those places most people have heard of but maybe never seen. For me it’s been a new place to explore, streets to wander through, and witness the eclectic aesthetic of a high altitude mountain town.

For this project I definitely want to focus on shooting film to hone in my workflow and discover what I need to do to get the look that I’m going for. The two images above are nearly exactly what I’m looking for in terms of warmth and tones. What I am really hoping for is getting into some DSLR scanning and really trying to pump out as much as I can without the Hasselblad X1. The biggest challenge for this project is that I want to do everything in the process, other than developing C-41 film, and I know this will take some decent trial and error. The final deliverable, I hope is a series of zines or postcards that can be sold in town.

Preliminary Review: Minox 35 GL

As I have confessed in the past, one reason I love film photography is the gear. I love spending hours on deep dive explorations of film related gear whether that’s antique large format lenses, discontinued expired film, cheap plastic point and shoots your grandma probably owned, or just dreaming about that Contax G1 or Leica… well anything. And after the million or so hours I’ve spent doing this I like to think I’ve seen it all. But, just as you think that your friends goes, “Hey look at my new film camera.” *points at little black box in the cup holder that looks more like lame toy then anything else* And after 15 minutes of discussion I learned that I would eventually, definitely add this small toy like camera to my collection, the Minox 35 GL. (Thanks Tyler Truksa)

The Minox 35 GL was introduced in the 1976 shorty after the first iteration of 35mm film cameras from Minox. The German camera manufacturer was known for its small 110 “spy cameras” and the Minox 35 GL definitely fits pretty well into this category. Interestingly enough between 1974 and 2003 there were 30 different iterations of this camera sold and all have just slightly different options and colors. Being that it was an automatic camera (aperture priority) and small it became a very popular consumer camera; even won the hearts of famous artists like Andy Warhol and Jackson Pollock.

An add for the camera from the 1970s.

An add for the camera from the 1970s.

So why did I cave and buy this weird plastic camera that makes you guess focus (more on that later)? Well, for me it ticks every mark I have for an everyday walk around film camera. It’s small, light, easy to carry, shoots 35mm, comes with a flash (at least mine did), and has a great lens. On top of that, it looks cool and if I keep it closed no one would have a clue that I’m even carrying a camera. I also really like that it’s aperture priority and therefore easy to just point, check your shutter speed and shoot!

The Minox 35 GL open with the leather Minox cover which let you add a camera strap. The strap is an old climbing sling I picked up used.

The Minox 35 GL open with the leather Minox cover which let you add a camera strap. The strap is an old climbing sling I picked up used.

With all of this awesome potential there must be some downsides and there definitely are some, especially if you’re just getting into film this camera could cause some extra anxiety. First, the battery in the later models isn’t made anymore and the most readily available batteries (for mine 4 357s silver oxide coin batteries) are slightly higher voltage causing the meter to be off. For my GL the meter is off by at least 2 stops which is a lot considering it under exposes the film by that much (though you can just set the ISO dial to compensate which is no big deal). Second I’ve read the magnetic shutters can be unreliable, though Minox does say that all of their products, even discontinued ones, can be repaired.

One of the biggest reasons for buying this camera is the lens. According to the internet it is one of the best point and shoot lenses out there beating the Olympus X models and even rivaling Contax glass. Being that I scan on a Epson V550 I’m not sure I will be able to see that sharpness, but when I get back to WUSTL I will definitely put a frame or two into the Hasselblad X1 to see how it compares to the Nikon 50mm F1.8 ais which is my other 35mm lens. But, from what I can see it a pretty good performer given the sized and design.

Jump Creek ID 2021. Minox GL, Fujifilm C200 shot at box speed, V550 scan using negative lab pro.

Jump Creek ID 2019. Minox GL, Fujifilm C200 shot at box speed, V550 scan using negative lab pro.

The test rolling I’m sharing are from a trip up to Stanley and Jump Creek with a great new friend. I never really need an excuse to go out and explore, but a new camera and a curious mind to coexist with sure makes it easy to escape for awhile. As I tend to do when I meet people like Eleysa is I get lost in conversation, focused on them and me in that moment. Usually this means I hike 20 pounds of gear which I never use and I get distracted from being present everytime I reach into my camera bag. But, I found the Minox allowed me to be fully aware of the possible images around me and allowed me to enjoy my time to a fuller degree then I usually would. In fact this was the only camera I took when I went to Pine Flats Hot Spring and I think it was a good choice.

Stanley Lake ID, 2021. Minox GL, Fujifilm C200 shot at box speed, V550 scan using negative lab pro.

Minox GL, Fujifilm C200 shot at box speed, V550 scan using negative lab pro.

Galena Summit just outside Sun Valley ID, 2021. Minox GL, Fujifilm C200 shot at box speed, V550 scan using negative lab pro.

Minox GL, Fujifilm C200 shot at box speed, V550 scan using negative lab pro.

Lunch and map sesh on Galena Summit just outside Sun Valley ID, 2021. Minox GL, Fujifilm C200 shot at box speed, V550 scan using negative lab pro.

Minox GL, Fujifilm C200 shot at box speed, V550 scan using negative lab pro.

Camp on Nip n’ Tuck road looking at the Sawtooth Range ID, 2021. Minox GL and FC 35 Flash, Fujifilm C200 shot at box speed, V550 scan using negative lab pro.

Minox GL and FC 35 Flash, Fujifilm C200 shot at box speed, V550 scan using negative lab pro.

Mt. Hayburn and the first Bench Lake ID, 2021. Minox GL, Fujifilm C200 shot at box speed, V550 scan using negative lab pro.

Minox GL, Fujifilm C200 shot at box speed, V550 scan using negative lab pro.

On another note, I think these images are my favorite from this summer. Not only was it a new shooting experience with a great new camera, but I realized that what makes images good in my book is more than color, sharpness, and composition. It’s the ability to share life with others, to be an observer and recorder of time passing and the relationships, friends, and places that build context for living. Recently this is what has been missing from my work, people to share it with. If you ever read this thank you so much Eleysa for sharing time with me and letting me fall in love with making images again! I think I’ve thought about this trip and our time together more than just about anything this summer.

Hot Springs ID, 2021. Minox GL, Fujifilm C200 shot at box speed, V550 scan using negative lab pro.

Minox GL, Fujifilm C200 shot at box speed, V550 scan using negative lab pro.

Hot Springs ID, 2021. Minox GL, Fujifilm C200 shot at box speed, V550 scan using negative lab pro.

Minox GL, Fujifilm C200 shot at box speed, V550 scan using negative lab pro.

Hot Springs ID, 2021. Minox GL, Fujifilm C200 shot at box speed, V550 scan using negative lab pro.

Minox GL, Fujifilm C200 shot at box speed, V550 scan using negative lab pro.

First impressions, I can’t get enough of this camera! It’s easy and honestly fun to frame through the little plastic finder and press the button. I find that I don’t mind guessing distance because I really do shoot further than 20 ft away often and I find that I can stick to a smaller aperture to maximize depth of field when not 20 feet away. I also find that it helps me slow down, giving me that slow process and intention I love film for. The other thing I like is that it is really not so intimidating to hand to a friend, I know the camera will do the hard work and being so small people don’t shy away from it like they do with the Pentax or other cameras I own. Finally, I just love that it is smaller than the size of my hand, literally. As I’ve mentioned before I love the form factor of the Fuji X100s and that is really why I still own and love that camera, but the Minox 35 GL is even smaller! All in all it will be great fun to have this camera around, can’t wait to keep playing outside and elsewhere with this in my pocket.


Technical side note:

The weird flair that sometimes happens when shooting toward the sun. Minox GL, Fujifilm C200 shot at box speed, V550 scan using negative lab pro.

Minox GL, Fujifilm C200 shot at box speed, V550 scan using negative lab pro.

This was my first test roll and I just want to share what I learned and what I’ll change going forward. First things first, the lens does seem to be sharp but you do need to hit the right distance to see it! What I mean is that the hyperfocal distance scale on the lens will give you an “acceptable sharpness” not tack sharp so going forward I will make sure to guess the distance not just put infinity at the hyperfocus line on the lense. I’ll also make sure to put the film through the Hasselblad X1 to really determine the sharpness. In short, not sure my copy can rival Contax glass but it is perfectly fine for what I use this camera for.

The second thing I noticed is some unflattering flaring from the lens. Being a Canon shooter I love my sun stars that you see when shooting stopped down. Sadly there are no sun stars with this lens and I even found that the lense produces some colorful patterned flair that can really reck and image like this image in the forest. It’s not the end of the world but not ideal for sure.

Finally, the exposure seems to be really quite good! Way better than most aperture priority cameras I’ve used especially other point and shoots. I also love the x2 exposure switch, I believe I used that on the hammock shot and it really made a big difference. To really put it to a test I think the next roll I put in will be a roll of Provia 100f slide film, this will allow me to really test the sharpness and the ability of the meter!


Bouldering Idaho Basalt and Being Back

DSCF3681.jpg

Being back in Idaho has had some real ups and downs. I love being in this part of the United States where I can climb, bike, hike, and see family. But what I didn’t count on was the rush of memories from last summer. My experiences and memories are heavily based on place, where I was and where I am. Being back in Idaho has brought back these complex feelings, memories, and connections which feel lost in time. Last summer in many ways felt like the best of dreams and being back now in the context of COVID, looming school, and anxieties manifested from what was; I’m having a hard time settling in the way I usually do.

There’s not much I can do about these feelings and I know like all things there is an ephemeral cycle. Last summer was a peak and I’m glad and fortunate to have had amazing people and relationships around me to help me get there. Now is different and that is ok, I still have great people around me and I’ve reconnected with many of those I didn’t see last summer. While I’m not at the peak of my cycle I’m trying my hardest to take advantage of the time here and now.

Nature has always been a release for me, a privilege that I want to share with as many people as I can. Yesterday I decided to go

and boulder with a good friend from school. We went out to a new place for me called Swan Falls just outside of Kuna, ID. The basalt boulders sprinkling the landscape here came from the high walls carved out by the river below. It was an uncharacteristically cool day for June in the Idaho desert creating an inviting environment to scramble the deep dark rock boulders and meet some new climbers. After cutting our hands on the sharp volcanic rocks and feeling the heat from the sun, the weather rolled in. It was a pretty amazing site to see the dark ominous clouds roll over the cliff edge, to feel the wind build up into tiny droplets, and to escape to our cars just as the rain got strong. Overall a great day.

DSCF3685.jpg
DSCF3682.jpg
DSCF3683.jpg

Minimalist B&W Film Developing

Introduction

As many people know I started my photography passion in high school when I took my first photography class. It was all analog shooting film through cameras, developing that film, then enlarging and printing the film images. It was a slow process that required true tactile skill and artistic vision. It always felt more like an art form then just pressing a shutter button on a digital camera. Ever since I settled into my digital camera kit a few years back I wanted to get back to this process of film photography. But where to start?

Mamiya C3 Sikor 80mm F2.8: HP5+ 125th @F4

Many people think film is scary, too many moving parts, things to think about, cameras that don’t automatically expose an image, and many other anxieties. For me, those have always been part of the attraction but what always got me was the price of film and more importantly the price of development.

I’ve been sending off my film for developing for some time now (yes plenty of stores still develop film) and in many cases it cost more than the roll of film itself. One way to avoid these costs is to develop the film on your own and that’s just what I started doing.

This post is going to cover my personal minimalist black and white film developing kit that I’m currently using and I’ll make sure to crunch the numbers to see what I’m actually saving! I’ll also suggest things that I wish I had or things that would make your life just a bit easier. Also just to be clear this is all you need to just develop your film in the context of a hybrid process where I scan my film instead of enlarging it onto photo paper.

Before I start with my process there are entire books devoted to just choosing the best film for the best developer and the most archival fixer for the most contrast for the light you have on your subject……. This stuff can get pretty heavy pretty quick so I won’t go into detail there I’ll just explain what I have currently and why.

BO9A4999.jpg

The Bare-Minimum

When I say minimalist I truly mean it so I’m simply going to give you a list of the must have things I use to develop my film:

1. Daylight developing tank: These usually come with a tank, film spools, and are made of plastic or metal made to keep the film safe from light when developing. The only thing that you need worry about is the film sizes the spool can take 35mm, 120, 127, or 4x5. Otherwise just get some that are affordable and work from used websites like Craigslist or Ebay. I personally bought a Paterson Super System 4 Universal Tank because it allows me to develop 2 rolls of 35mm or one roll of 120 film as well as 127 film if I need. It’s even tall enough to be able to develop 4x5 film using the taco style. (more to come on this)

2. Developing Chemicals: There are a lot of choices here and at minimum you need developer and fixer. Some developers are reusable some are single use as well as all have certain characteristics. I avoided all the confusion and went with convenience choosing a monobath which both develops your film and fixes it in one shot. Specifically, I bought Cinestill’s Df96 in powder form to make a liter of chemistry which is good for 16 or so rolls of film.

3. Thermometer: Most film chemistry is very sensitive to temperature so you must keep track of the water temperature and chemistry temperature. I used an old electric meat thermometer because of the fast readout but anything that accurately measures temperature should be fine.

4. Measuring Cup: The best thing to use if you have the money is a graduated cylinder if you want to get the most reproducibility. I however just used a glass measuring cup from the store which works just fine. With the monobath, since it is reusable, I don’t need to worry about volumetric measurements as much as other one shot developers.

5. Small Bottle Opener: These are used to open the 35mm film canisters. If you don’t use one of these then you risk scratching your film and you will waist a great deal of time.

6. Scissors: A good pair of scissors is needed to cut the film of the spool and create a nice flat leader to load up the film spool. Some people like to use safety scissors but I just use normal scissors since cutting yourself is pretty hard.

7. A Dark Room: Obviously all the loading of the film into the daylight tank must be done in complete darkness. Most houses have a place that is truly dark or you could make truly dark. I use a half bathroom in my apartment and a dark sheet to block the stray light from the door.

8. Binder Clips: Binder clips are probably the most effective office supply to own. They are perfect for holding your film strips to dry in a dust free place.

Not Necessary But You’ll Probably Want it.

The list above is the absolute minimum and assumes you have a couple things that some people may not so this is a list of things you may want to get when you have money.

1. Photo Flo: This is a kodak chemical that is used for the final wash before you hang the film to dry. It reduces water spots that can appear on film as well as streaking on the negatives. I do personally use this in my process because the water I use where I live is mostly hard water.

2. Film Changing Bag: Effectively a black cloth bag that is a portable darkroom with enough space to load your film into the light safe tank. These are nice because you can develop film even if there is no real dark room where you live. Watch your scissors though!

3. Dedicated Timer: Yes you can use your phone or timer apps but a dedicated darkroom timer is really nice to have and can help the reproducibility of your development process.

4. Stock Bottles: Any photo supply store will have a selection of stock bottle while a one liter soda bottle works fine if stored in a dark place a good stock bottle can help keep chemistry for much longer if used correctly.

5. A Funnel: Pretty self explanatory but a good funnel can really make things easy. I’m using a makeshift funnel made from a water bottle I cut in half and melted with a liter. It works but isn’t real pretty.

6. Film Sleeves: For protecting your film for years to come it is important to store your negatives in plastic film sleeves. Not only are they great for organizing your film but they also protect the film emulsion from scratches and dust. I just recently bought a couple packs of these for my pile of negatives. Alternatively, just find a box or bin and keep them in a cool, dry, place away from sunlight.

Cost at the end of the day

Nikon FM 50mm F1.8 Ai: Arista 400 1/60 @F1.8

That’s it really. The fact that I can just purchase one bottle of chemistry and develop my film is really quite amazing! With shipping the chemistry was $20.74 so if I truly get 16 rolls of film then I’m paying around $1.30 a rolls which is easily affordable and much cheaper then the $5.00 lab fee. Now I think I’m only going to be doing B&W at home because the lab charges about the same as what I can buy C-41 color chemistry at home for (about $4.00 a roll). Slide film is getting close to being cheaper at home with my lab charging $7.26 and at home chemistry coming in at about $5.50 but being that I can just send off all the color film to the same place I don’t find that a couple of dollars is worth it. I also don’t shoot a lot of slide film so there’s that too.

Obviously, there is some initial buyin to get started with film development but even that was surprisingly affordable. My fancy do everything tank was $32.75 and the rest of the supplies I could find around the house. The not necessary list will cost a bit more but you really don’t have to have them as long as you’re willing to sacrifice a little flexibility with your process. So if you’re going to be shooting black and white film at home developing with this “easy” minimal setup is really the way to go!